What is App Service Migration Tool?

App Service Migration Tool is a migration tool developed by Microsoft that analyzes the applications in existing on-premises in detail and prepares reports for a possible migration. We can start scanning by providing the application with a Public endpoint. Many details such as what technologies are used in the application, traffic, utilization, ports and settings are examined in scanning. After the endpoint scan is complete, we can download a transport assistant that will help us move step by step. We can access this assistant at https://appmigration.microsoft.com/. This assistant is only available for .Net and PHP applications. It is stated in the link above by Microsoft that it will be supported in other application languages.
Begin Assestment
First, by entering https://appmigration.microsoft.com/, we start our assesment from our endpoint and check the suitability.
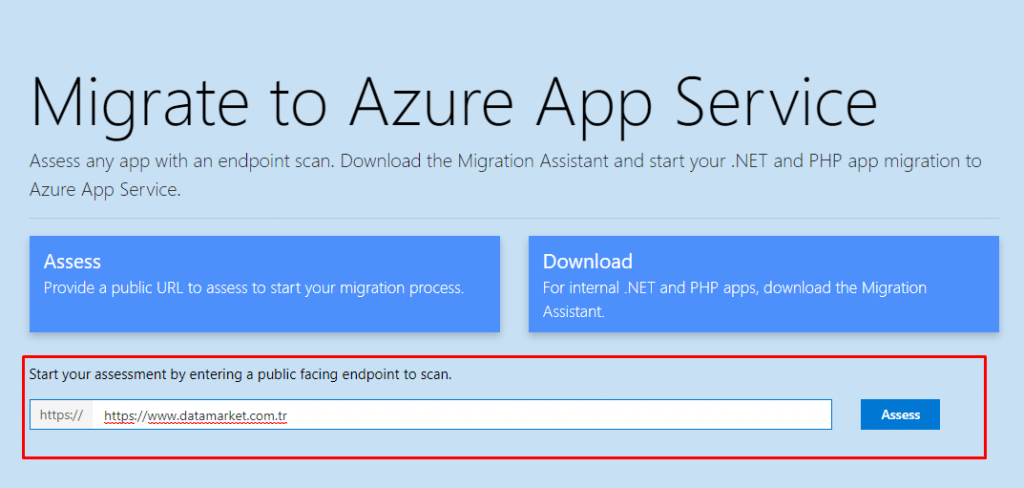
As a result of Assestment, information such as the following comes before us. This information includes all the technologies, frameworks, hosting information and web server information running on the site.
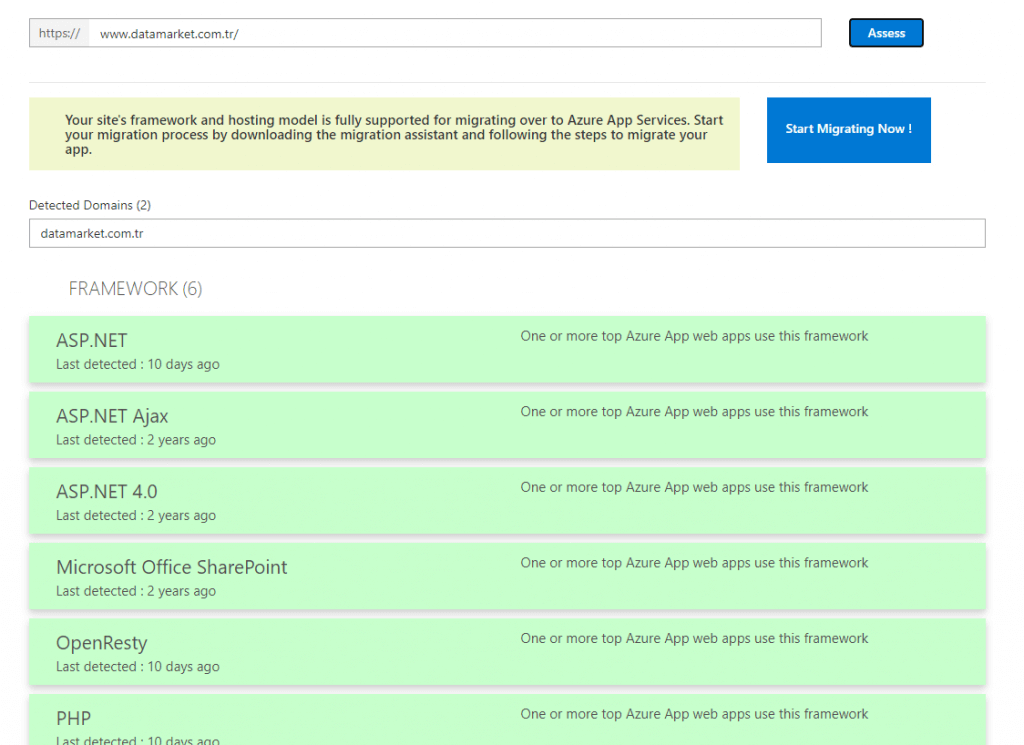
As a result of this assestment, Azure Migrate gives us a message like:

This message states that our site is fully compatible with Azure App Service. If your application is .Net or PHP by pressing the Start Migrating Now button, you are directed to the page to download the assistant.
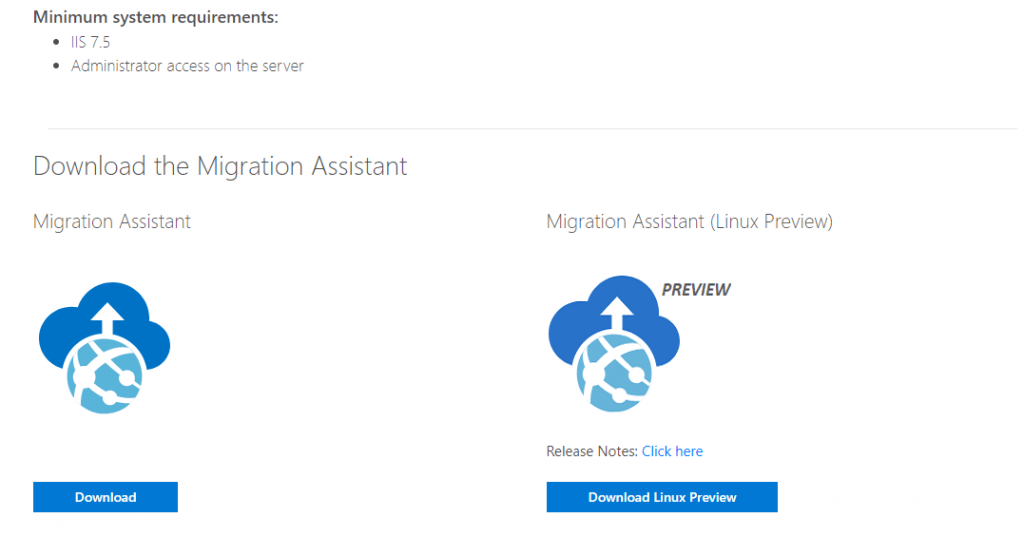
Begin Migration
We will start migration by downloading the migration assistant according to our operating system from the link. The important point is that we are downloading this assistant to the machine with IIS running on our sites. After deploying the application to the machine with IIS, a screen like the following welcomes us;

We decide which sites on IIS will be moved and we enter next. The next step, on the Assestment report screen, is looking at connection strings, configuration settings, certificates and many settings, indicating problems that may arise after migration.
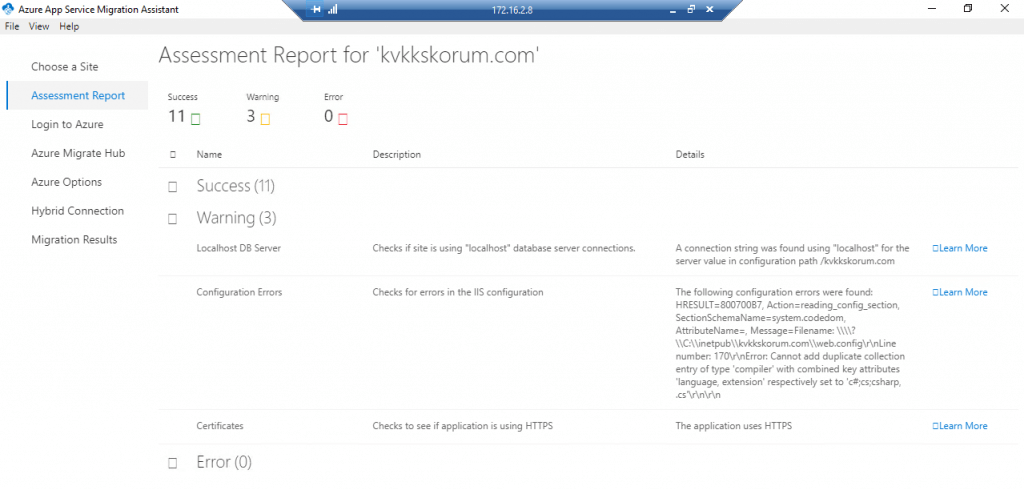
If we don’t see any problems, we continue by saying next. He wants us to login to Azure in the next step.

By pasting the code on the screen that opens, we log in to our Azure account and automatically proceed to the next step by the program. In this step, he wants us to choose a Migrate project. If not, we can create a new one.

If we want to create a new one, we are directed to Azure Portal and from here we select and add Web App Assestment as migration tool
In the next step, we choose which resource to move. We enter our App Service information and adjust the database configuration, if any.
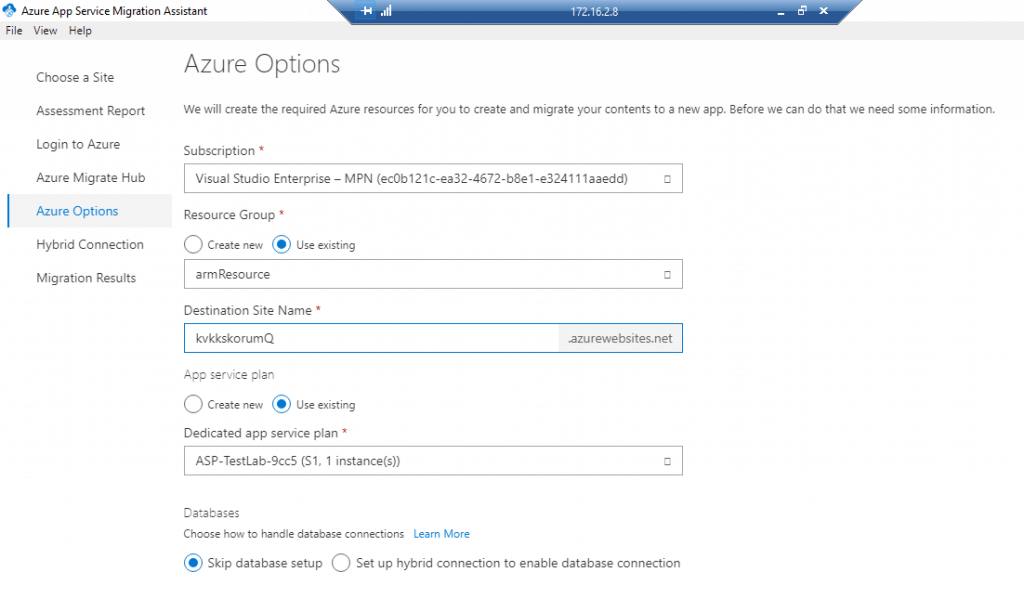
To automate the process later, we can export Arm Template or start Migrate directly and start our site migration

When the migration starts, step by step migrations will be performed as in the image above. If there is no problem, you will get a success screen in the image below,
The appearance of our site on the portal will be as follows.
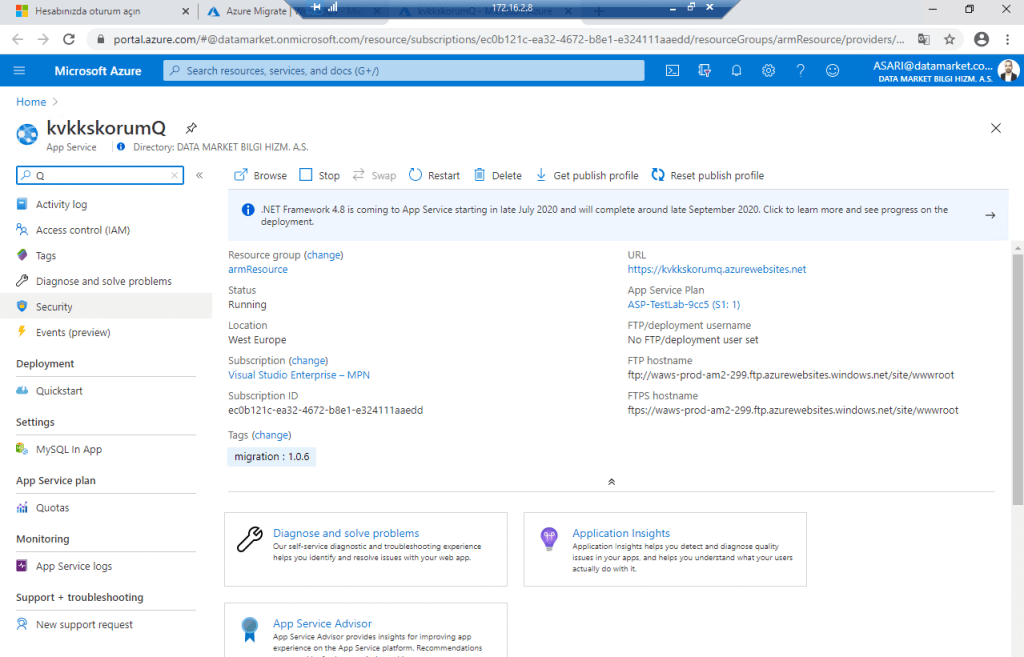
In this way, we can migrate the applications in our IIS directly to Azure without dealing with FTP or other tools.