
In this article, I would like to mention the servant who provides convenience in terms of both cost optimization and storage management in the use of Azure Storage. I hope it will be useful to you.
What is Azure Blob Storage Lifecycle Management?
Lifecycle Management, you rarely or never have access to your files in Storage. It enables to change the Access Tier by defining the files based on the frequency of access. Storage account type must be StorageV2 (general purposeV2) to use this service. If your current storage account type is different, you need to upgrade.
We can define Access Tier (Hot, Cool and Archive) as below.
Hot: It is used when there is constant access to files. Storage cost is high and access cost is low.
Cool: It is used for files with less access. Storage cost is low and access cost is high.
Archive: It is used for files with almost no access. Storage cost is the lowest. If access is desired, the cost will increase.
How to Upgrade Storage Account Kind?
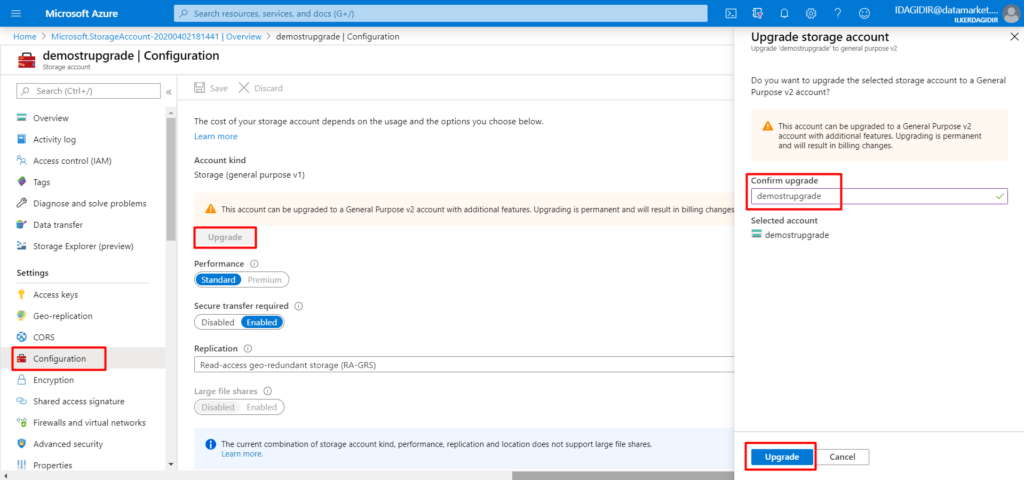
We enter the name of Storage to be upgraded in Storage Account > Configuration > Upgrade section and call Upgrade. Upgrade is done in a few seconds.
I share step by step how to set up Lifecycle Management.
We proceed from the current Storage Account.

We call it Add Rule so that we can create a new rule by entering Lifecycle Management under the Blob Service heading of your Storage.
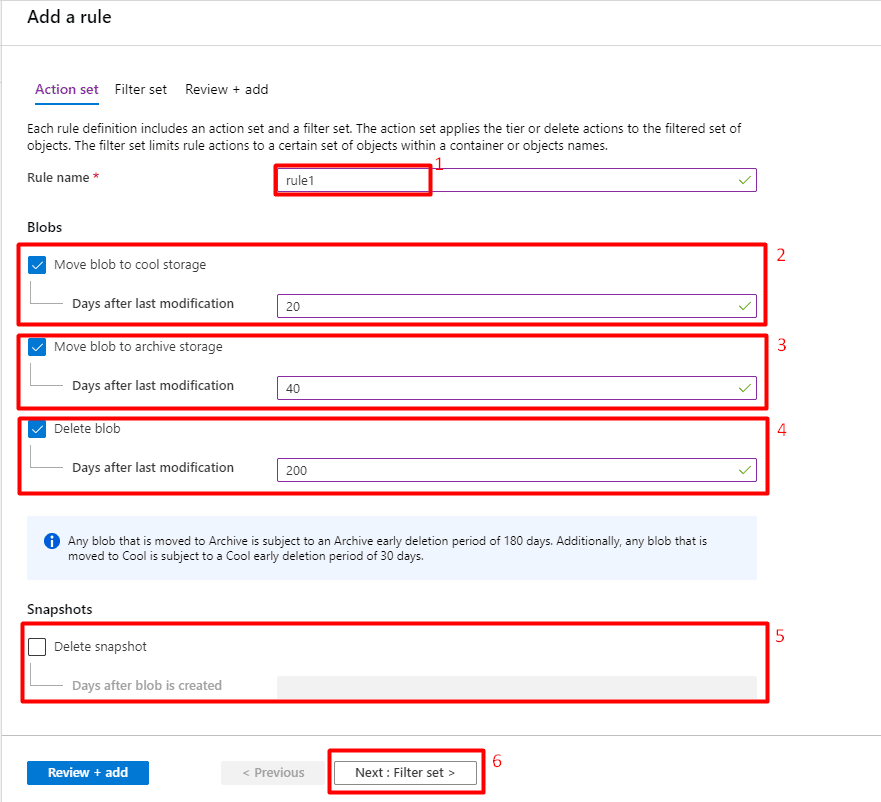
I list below what you can do on the screen that we see.
- We need to specify a name for the rule to be added.
- Change it to Cool if there are no changes or access for 20 days.
- Change it to Archive if there have been no changes or access for 40 days.
- If there is no change or access to the files specified for 200 days, it will be deleted.
- We determine how many days after the Snapshots created in the blob will be deleted.
- After we have defined the rules, we can go to the filtering section.
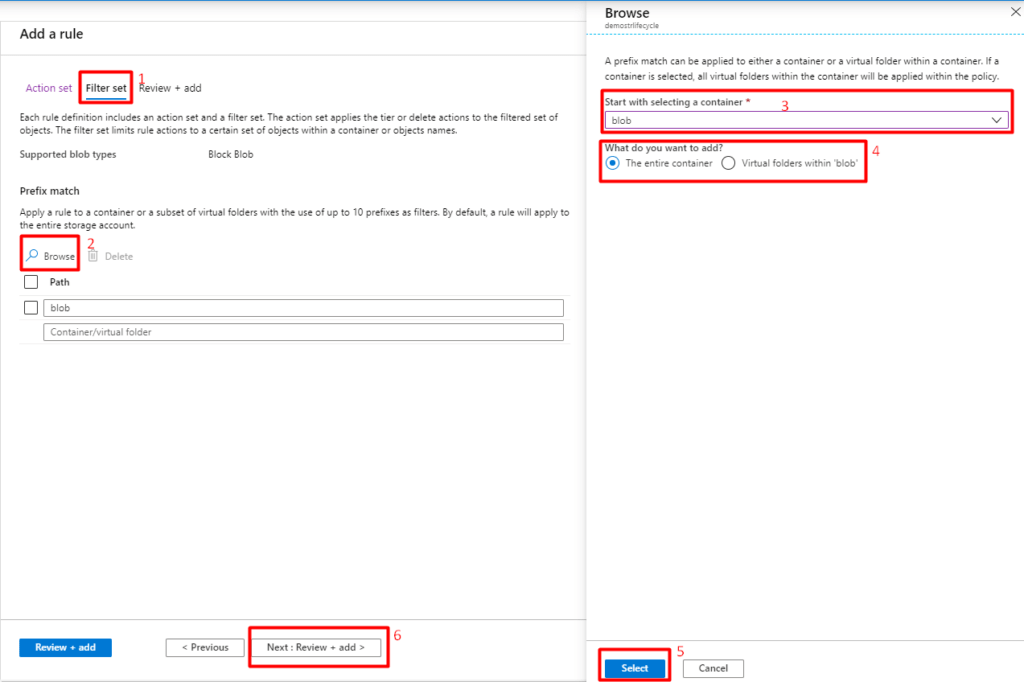
Note: By default, a rule will apply to the entire storage.
- Where we will determine which folders in the container will affect.
- We determine the folders to be added by saying Browse. Note: We can add up to 10 folders.
- The container in the blob storage is determined.
- Here we have the option to apply to the entire container or apply to the folder or folders I will select in the container.
- When our configuration is finished, we finish by saying Select.
- The next step is to click on Next: Review + Add to make our actions now valid.
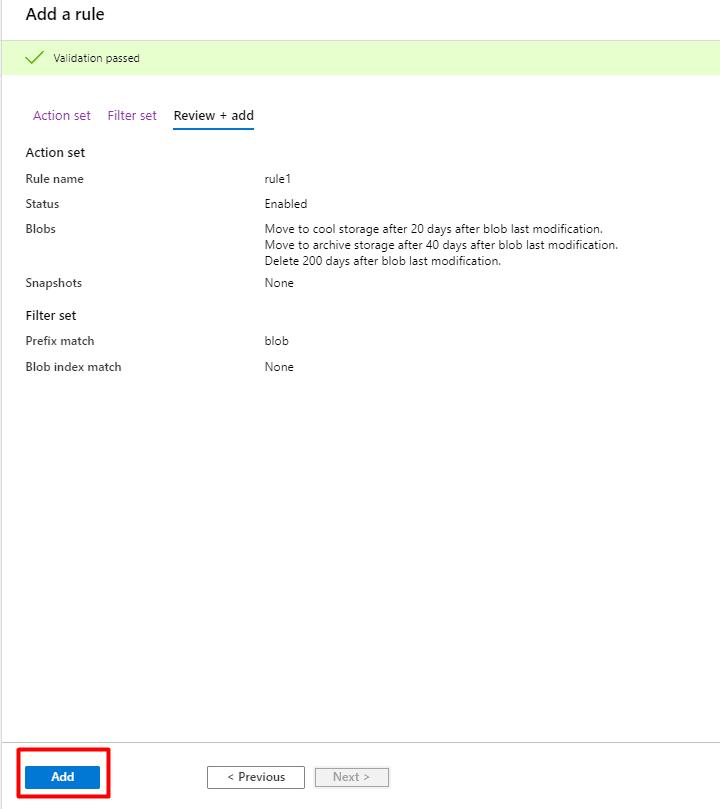
We can see a summary of the changes we made on this screen. By saying Add, the rule will be activated.
It is possible to see the code side of the rule or rules we have created. I share the screenshot below.

I hope it was a useful article.
References:
https://docs.microsoft.com/en-us/azure/storage/blobs/storage-blob-storage-tiers?tabs=azure-portal
https://docs.microsoft.com/en-us/azure/storage/common/storage-account-upgrade?tabs=azure-portal