
One of the most important issues to consider when managing Azure resources is cost management. When the Azure usage report is generated, virtual machines will probably be the costliest resources. Automatically starting and stopping Azure virtual machines based on usage hours and days can save significant virtual machine costs compared to the time it is deallocated.
It should be considered whether virtual machines should be running all the time, or whether some virtual machines can be stopped in a specific program to save on operating costs.
Automation Account can be used to start the Azure virtual machines on a planned basis, and the “auto-shutdown” feature offered by Azure or Automation Account can be used to stop them. This article will explain how to start and stop Azure virtual machines on schedule using tags and PowerShell Runbook via Azure Portal.
Assigning Tags to Virtual Machines
This article will use the Azure tag feature to define virtual machines to schedule start and stop times. On the other hand, for example, a schedule can be made for all virtual machines under a certain subscription or resource group.
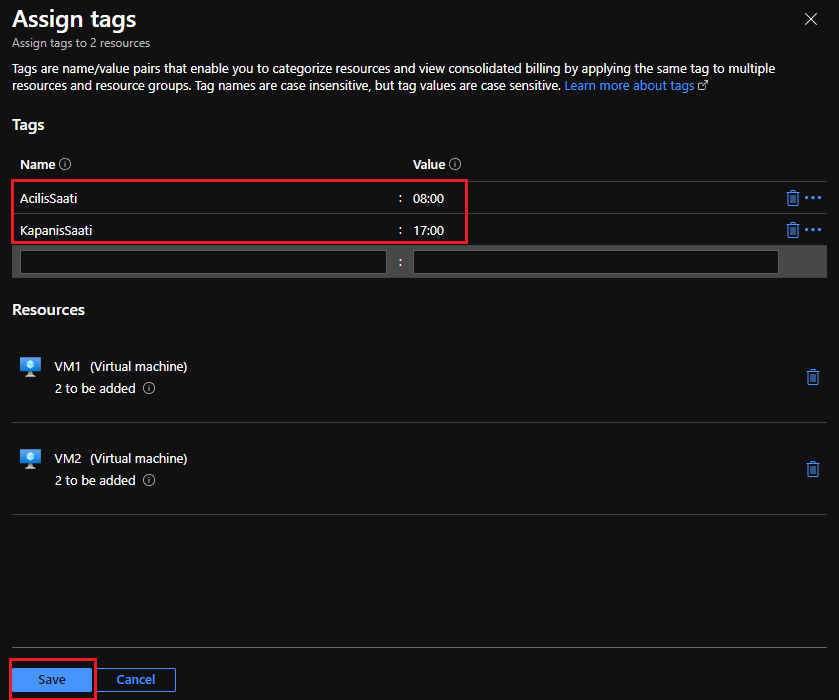
Using the Azure Portal to assign tags to multiple virtual machines is a fast and easy way. As shown in Picture 1, by selecting virtual machines and clicking the assign tag button, the desired tag can be easily assigned to the selected virtual machines.
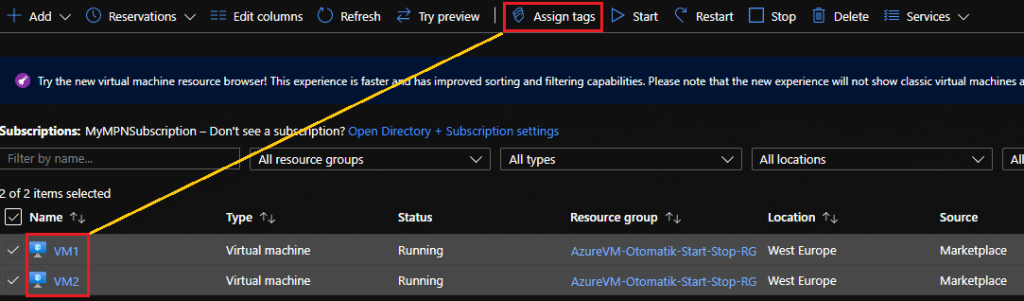
Then the name and value to be assigned to the virtual machines are determined. As a value, planned opening and closing hours for virtual machines can be entered.
Creating Automation Account
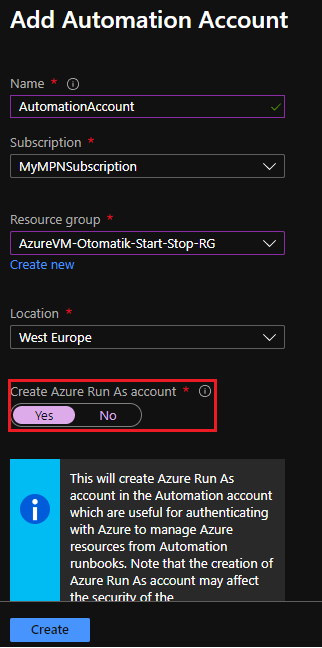
To run Runbooks, an Automaiton Account and an Azure Run As account are required. While creating Automation Accuont, the “Create Azure Run As account” option should be selected as “Yes”.
Run As Account: Run As accounts in Automation Accounts provide authentication to manage resources in the Azure Resource Manager or Azure Classic Deployment model using Automation workbooks and other Automation features.
Creating Automation Account Runbook
PowerShell commands to select the virtual machines to be automated will be written into the runbook.

Then, with created Run As account and virtual machine tags, the opening and closing commands of the determined virtual machines can be written and the runbook can be published, as seen in Picture 5 and Picture 6. With the tags assigned to the virtual machines, an efficient filtering will be applied while the virtual machines are pulled.


Code Blocks
## Getting Azure Run As account information
$Connection = Get-AutomationConnection -Name ‘AzureRunAsConnection’
## Adding Azure Run As account to existing session
Add-AzureRMAccount -ServicePrincipal -Tenant $Connection.TenantID -ApplicationId $Connection.ApplicationId -CertificateThumbprint $Connection.CertificateThumbprint
## Getting Azure Run As account information
$VMs = Get-AzureRMVM | Where-Object {$_.Tags.AcilisSaati -eq ’08:00′}
## Starting Virtual Machines
$VMs | Start-AzureRMVM
## Getting Azure Run As account information
$Connection = Get-AutomationConnection -Name ‘AzureRunAsConnection’
## Adding Azure Run As account to existing session
Add-AzureRMAccount -ServicePrincipal -Tenant $Connection.TenantID -ApplicationId $Connection.ApplicationId -CertificateThumbprint $Connection.CertificateThumbprint
## Getting virtual machines with a tag value of 5pm
$VMs = Get-AzureRMVM | Where-Object {$_.Tags.KapanisSaati -eq ’17:00′}
## Deallocating Virtual Machines
$VMs | Stop-AzureRMVM -Force
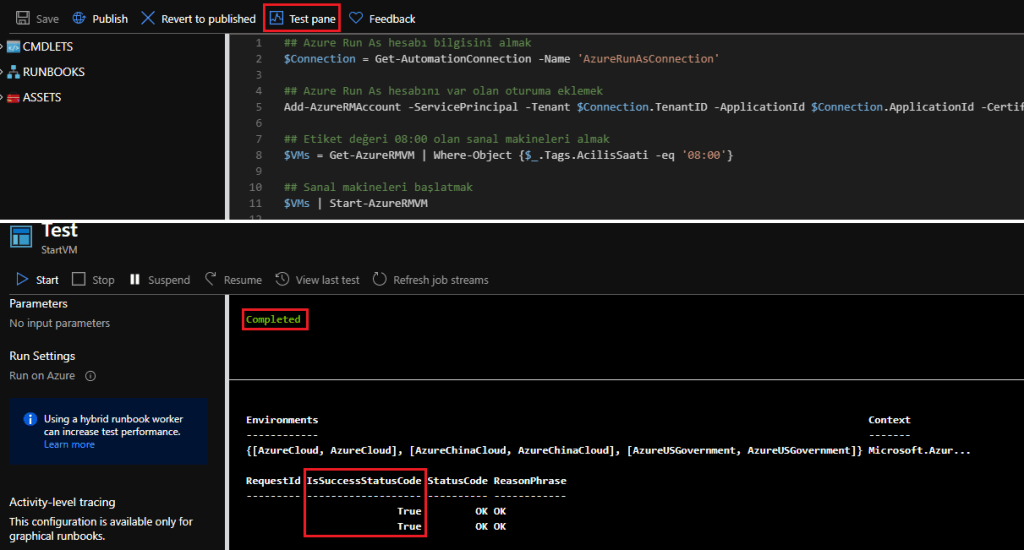
Testing Runbooks
To test runbooks, before publishing, the codes can be run by clicking the Test pane button. The code result should output as an output showing that the transaction is completed without any errors. Then, when you go and look at the status of the virtual machines, it can be seen that the commands run successfully.
Schedule Runbooks
After creating the runbooks, testing their work, and publishing them on Azure, all that remains is to schedule them to run at desired times. This can be done by using the “schedule” feature of Automation Account. For this, first of all, schedule should be created according to the desired time. Then it is necessary to link the runbook published with this schedule.
Create a Schedule
A schedule can be added by clicking the schedule button under Automation Account ‘shared resources’.

Schedule can be run repeatedly at specified times by selecting the recurring option while adding a schedule.
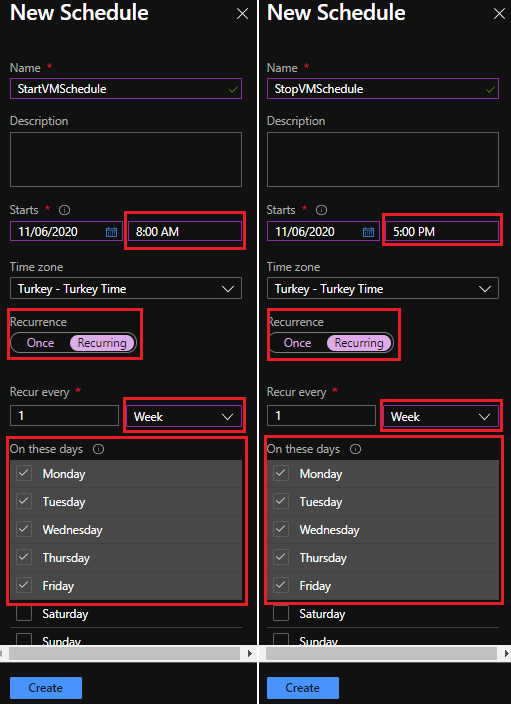
Then the created schedules will appear in the schedule list.

Adding Schedules to Runbooks
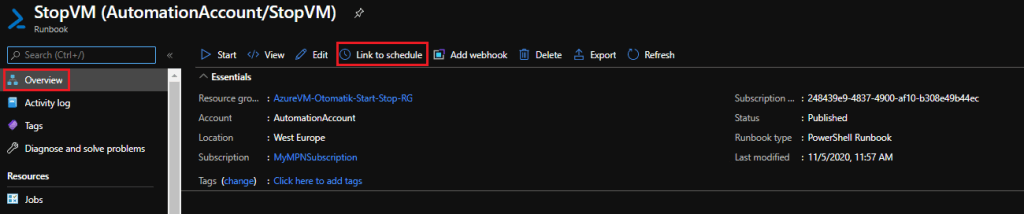
After the schedules and runbooks are created, the remaining step is to ensure that the runbooks are connected with schedules that will enable them to run at the specified times. The desired schedule can be selected by clicking the Link to Schedule button in the overview tab of the desired runbook.
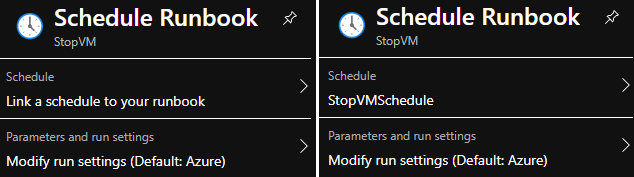
Then the desired schedule can be selected as shown below.
Things to pay attention
Automation can provide significant cost savings. However, attention should be paid to the following issues:
- One of the tags provided with filtering should not be assigned to virtual machines that need to work 24/7.
- Likewise, when selecting a tag, it is important to make sure that it has not been assigned to one of the critical virtual machines before.
- It may be necessary to assign different tags, runbooks, and schedules if the connected resources need to be in a certain order as they open and close. For example, a server hosting an application and a server containing a database should be turned on and off respectively.
- If the start button is pressed after the runbook is published, the commands written to turn on the virtual machines will be opened if the machines are turned off directly, and the commands written to turn off the virtual machines will be turned off if the machines are turned on. It is important to run runbooks under control.
Summary
This article explains how to use tags and automation account for the runbook, which enables to automate the starting and stopping of Azure virtual machines on a specific schedule. The following processes were covered step by step:
- Assigning tags to virtual machines,
- Assigning tags to virtual machines,
- Creating a schedule,
- Linking schedule and published runbooks.