
Whats is Docker?
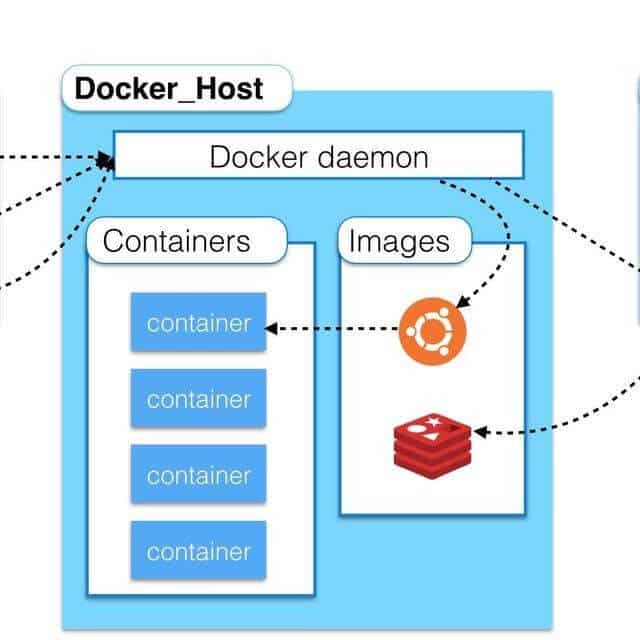
If we need to start with a classic definition, Docker is the most used software container platform in the world. Containerization means putting it in a container. Docker is a technology built on Linux Containers (LXC) that was added to Linux Kernel in 2008. LXC provides Containers (Linux based systems) that work in a isolated form in Linux within the same operating system.
With Docker, you can quickly deploy applications to any environment, scale applications, and make sure your code will work any platform.
.NET Core App Sample
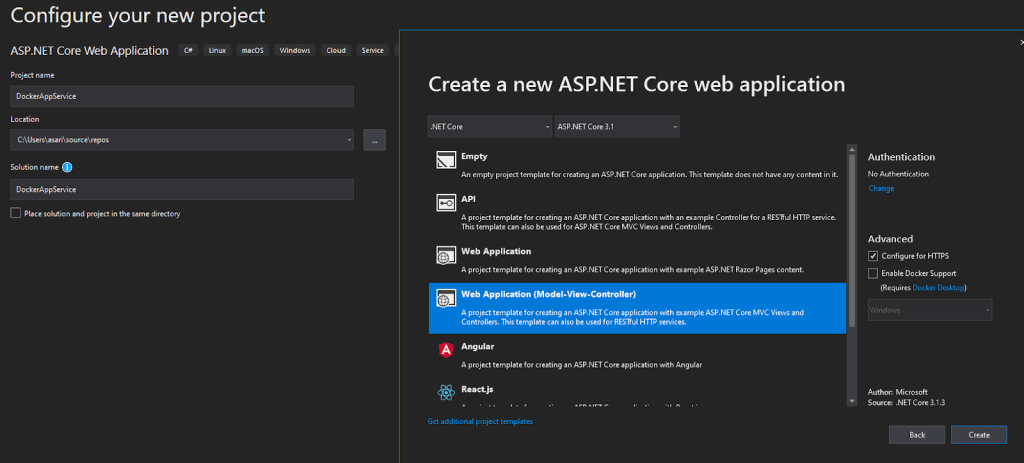
First of all, we create a new .Net Core Application by clicking Create New Project from our Visual Studio
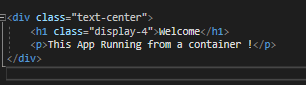
At this stage, the content of our application is not important, so we make a small change in the Index and save our application.
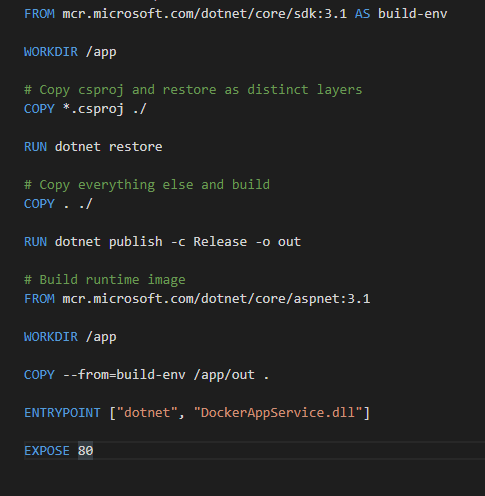
We create a file named Dockerfile by move to the file directory of our application. It is very important for the docker daemon that this file is exactly the same and it has no extension on it. In this file, we specify the steps that docker daemon should follow while turning our application into a image. This file needs to be customized according to each application language and application variable. The dockerfile that we will write will be as follows in its simplest form.
What we need to do after this step is to compile our container with Docker Desktop from the command line. To do this, we open a command line and go to the directory where our dockerfile is located. In the related directory, we run the command below to compile our dockerfile.
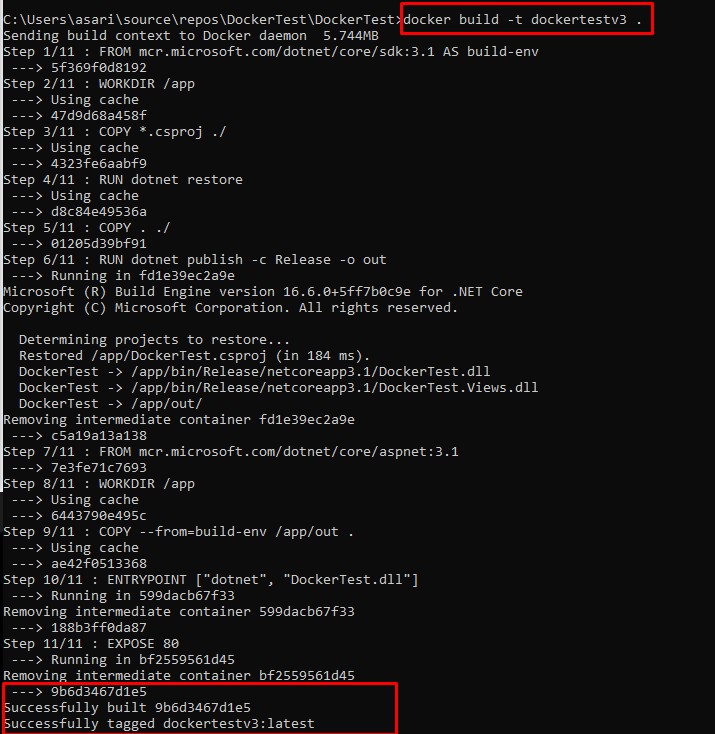
In the command. Since we use it, it compiles the dockerfile in the environment with the dockertestv3 tag and turns it into an image. The resulting image’s id starts with 9b as below. If we want to use this image
docker run -it –rm -p 8080:80 dockertestv3
With the command, we can run it in our local docker instance, but what we want to do is to do this in a manageable way as PaaS in the app service in Azure. So we need to send this image to a repository. Our preference will be the Azure Container registry here, but you can upload it to DockerHub or any other repostiries if you wish. When our App Service requests the application it will run from us, we will show the image inside the ACR (Azure Container Registry) later.
For this, in our azure subscription
Az acr create –name mspTestAcr –resourcegroup TestLab
We create a new container registry with the command.

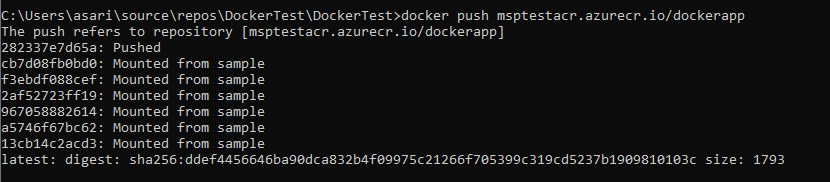
Coming back to our command line, we login with the Az acr login –name mspTestAcr command. Then we send our image to our registry by following the commands below.
Docker tag 9b6d3467d1e5 msptestacr.azurecr.io/dockerapp
Docker push msptestacr.azurecr.io/dockerapp

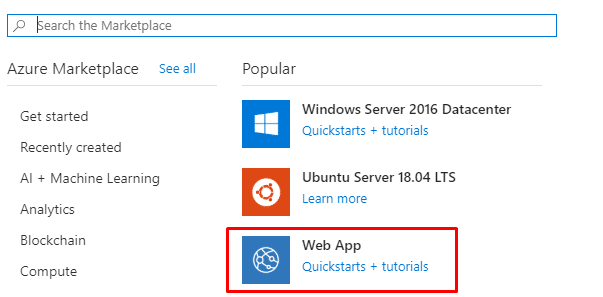
With the latest tag, we have an image on our repostry. After this step, we can create our Web App. We are creating a new Web App from Azure Portal.
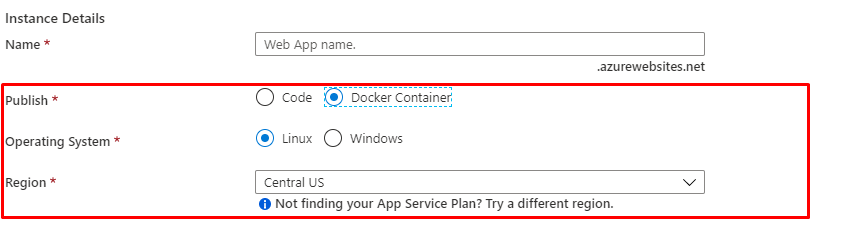
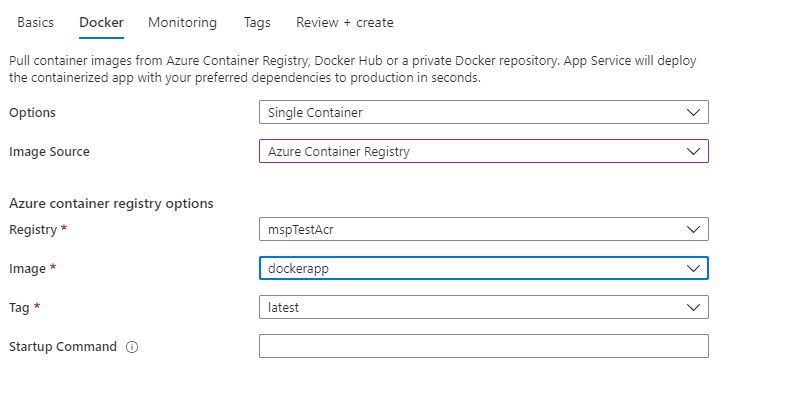
When creating our Web App, we choose Docker Container in the section where the site asks whether it will work from code or image.
In the next step, we indicate where the application image is and what image it is.
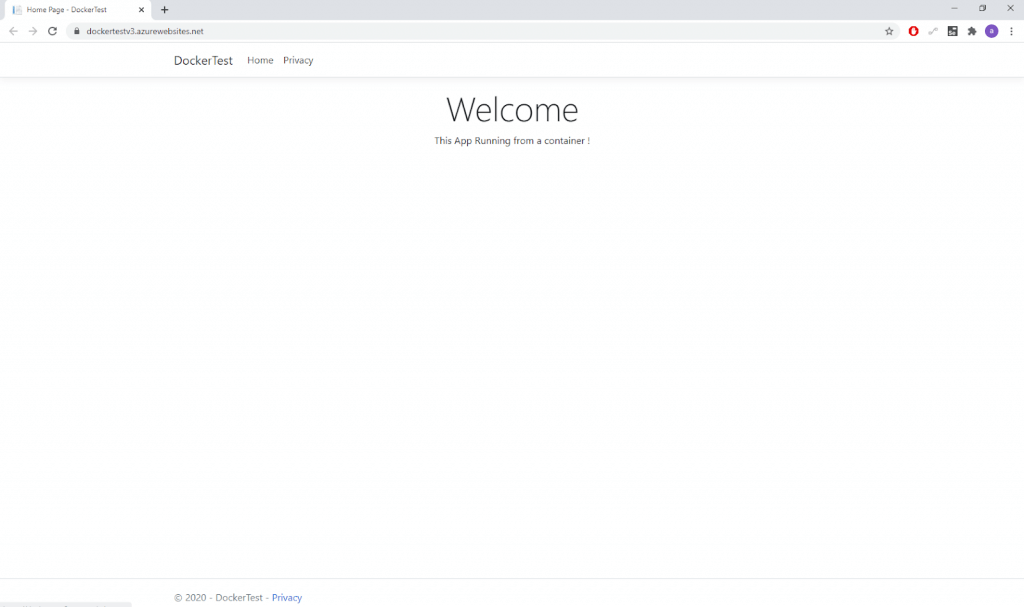
When we create our service in this way, we now have a working web app from our image.
Azure Devops Integration and CI/CD
If we want all of these processes to be done in an automated way, here comes the Azure DevOps service that we can use for free. Azure The DevOps service provides services such as Kanban Board – Work Items, Git Repostiry, CI / CD pipelines, Tests and Artifacts, making our application life cycle fully manageable. Here we push our application codes to our repostirym and set up a CI / CD pipeline that listens to the master branch of this git.
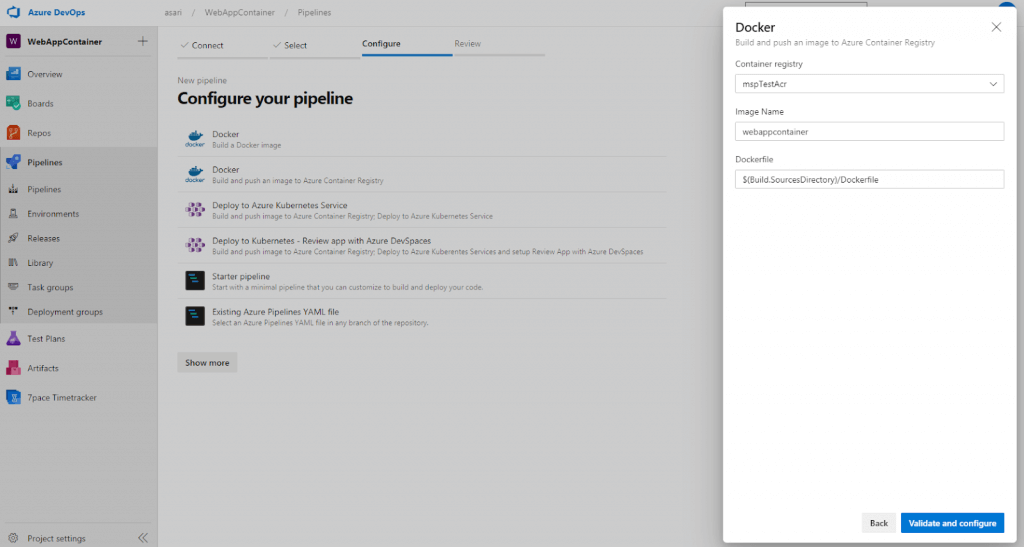
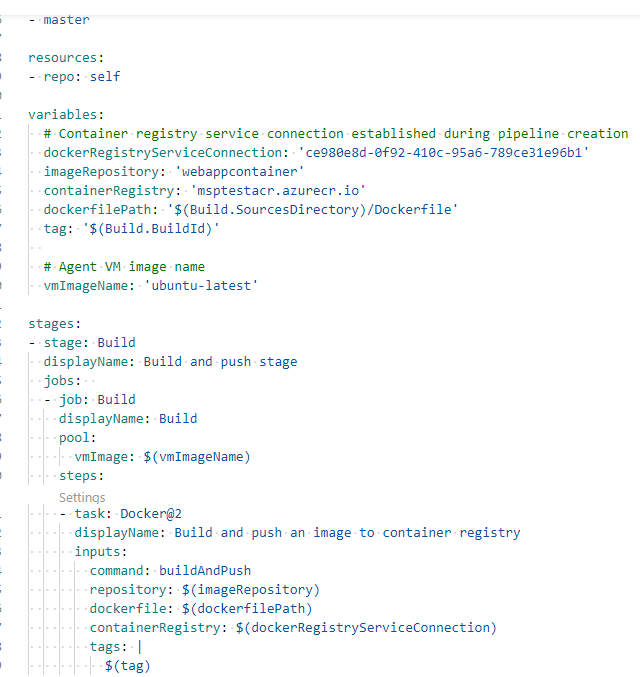
We choose Docker build and publish an image to Azure Container Registry, which is already a ready template for us, and our yaml emerges as below.
As a result of this process, we run our pipeline and our image is compiled in 1 minute. In the next step, we will ensure that the compiled image is pushed to the Container registry.
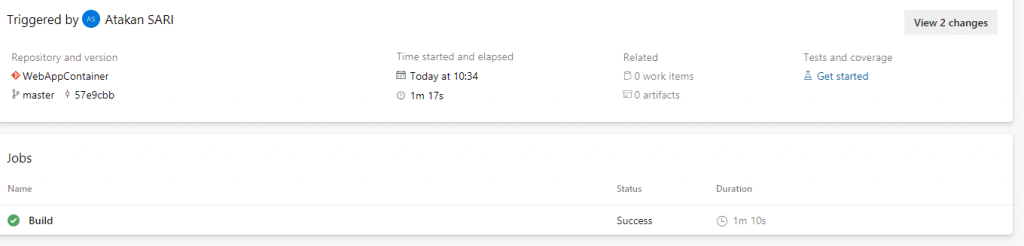
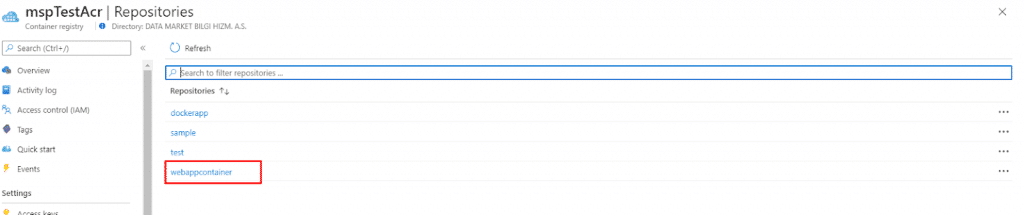
Our Pipeline worked successfully and produced an image as output. When we look at our Azure Container registry, we can see that our new image came here.
As the next step, we will create the step to create a new app service. In this step, we set up the CD pipeline.
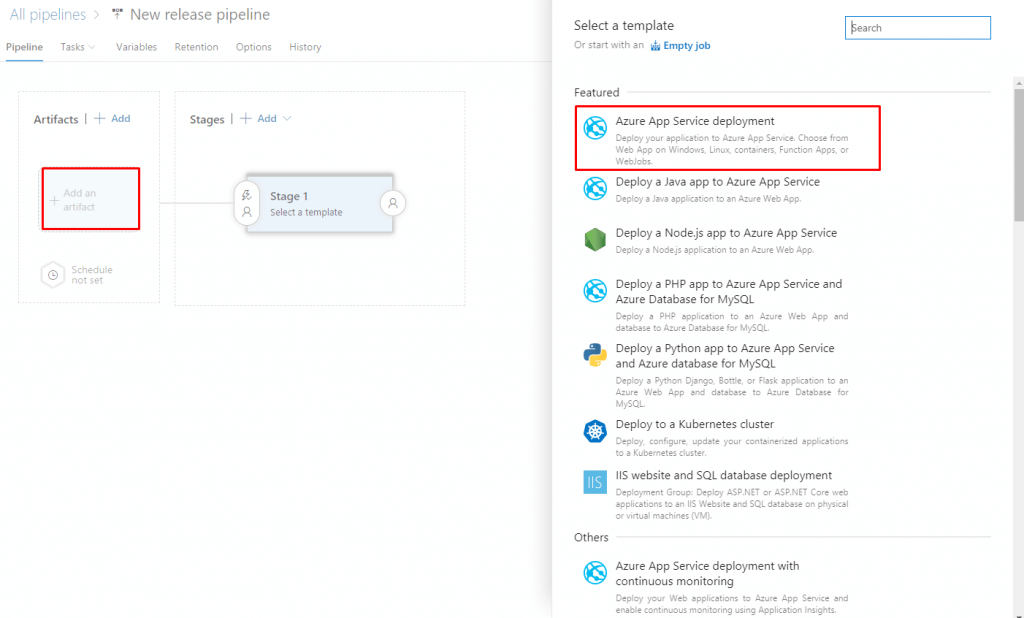
We select our Build pipeline as Artifact and select the App Service Deployment Template as the output.
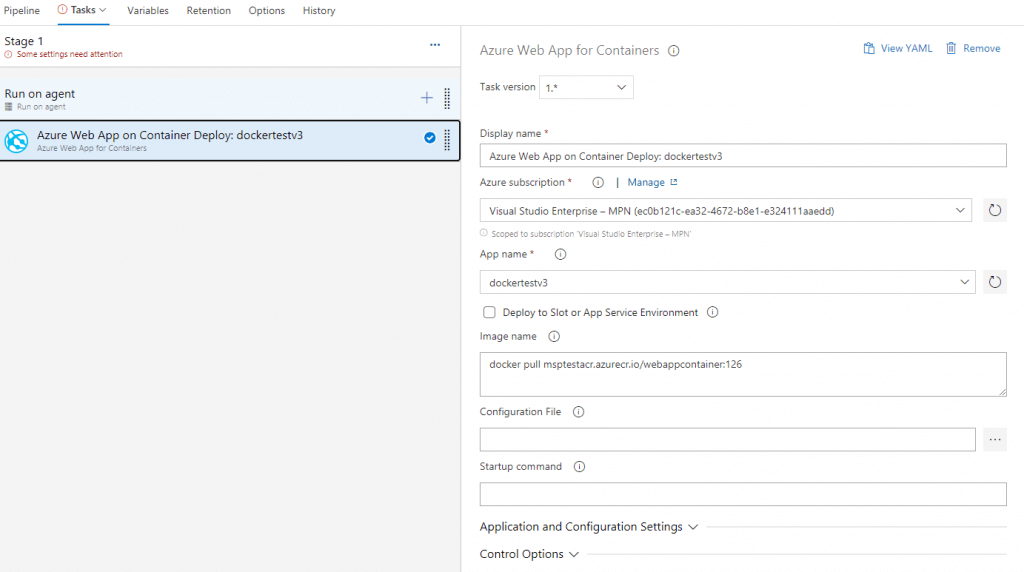
However, we choose the Web App on Container task as a new task, not the one it brings to us, and we enter the information as follows.
As a result of this process, our pipeline automatically gets a new image every time the code is pushed and pushes it into ACR. The pushed image is deployed to azure web app. Our process is fully automated.